Orders
From #openttdcoop wiki
Orders make our networks work, they are what keeps our network alive, the cash flowing and prevent jams. Without proper order setup the trains won't go to the correct destination and won't be able to make money. This guide will lead you through the basics of giving orders and will also show you some more advanced orders.
Basic orders
You have build two stations and now you want to have a train running between them. The first thing you need to do is add the both the stations to the order list. We usually begin the orders with the pickup station:
After this you add the drop station:
You now have given the train both the destinations, to let this route be effective however you need load orders. A load order is an order that tells the train to do a specific kind of loading. There are a few different kind of load orders:
- Full load - this makes the train wait at the station until it is fully loaded with one type of cargo and then it will leave the station and head for the next order.
- Unload - this makes the train drop all its cargo at a station, it doesn't matter if the station accepts the cargo or not. This load order is NOT recommended.
- Transfer and take cargo - the default transfer order, this order lets the train keeps its current cargo and also take the cargo that is at the station with it.
- Transfer and wait for full load - this allows the train to keep its current cargo and it will wait until the train is fully loaded too. This order is simular to the full load order.
- Transfer and leave empty - this will unload all cargo on the train just like the unload order, this order however gets the train "virtual" money (the yellow money).
The full load order will be explained first, the transfer orders will be discussed later on this page.
The full load order allows you to force a train to wait until one cargo type is fully loaded. This is very usefull as there won't be half full trains driving around. When the full load orders are given to the train in the previous example:
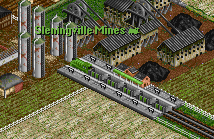
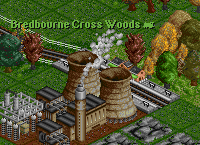
These orders mean that the train will go to Slenningville Mines and wait until it is fully loaded with coal before it leaves. It will then go to Bredbourne Cross Woods to unload all the coal at the powerplant. Notice that there is no unload order as the station accepts coal because there is a powerplant.
Non-stop orders
Sometimes you want trains to take a certain route, OpenTTD has waypoints for this. They are limited to one lane however and aren't usefull on mainlines. For this reason we have non-stop orders, you can make a normal station that spreads over multiple lanes of the mainline and send trains there. A new problem arises with this: trains stop at the waypoint station, the solution is simple: non-stop orders. Non-stop orders tell a train to NOT stop a certain station, this way you can use waypoint stations. A side effect of this kind of non-stop orders is that trains only stop at the stations they are given in their order list, although this is usefull in cargo networks it is quite annoying in ICE/SBahn networks where SBahn trains have to stop at every station in the SBahn ring. Note: we don't use waypoints anymore because we now use YAPF and there is no need to point trains to where they must run through.
Transfer orders
When building multiple stations that are meant to be serviced by one train (or multiple trains sharing orders) you might need to use transfer orders. This kind of orders allow trains to keep cargo in the train and allow trains to unload all cargo at a station without loosing money. Transfer orders use virtual money this means that trains earn money so they don't show up as a train making a loss but the money won't be added to the bank balance. This is extremely usefull for making feeders. Remember that there are 3 kinds of transfer orders:
- Transfer and take cargo - the default transfer order, this order lets the train keeps its current cargo and also take the cargo that is at the station with it. This order can be asigned by clicking the transfer button while you have an order selected.
- Transfer and wait for full load - this allows the train to keep its current cargo and it will wait until the train is fully loaded too. This order is simular to the full load order. This order can be assigned by clicking both the transfer button and the full load button.
- Transfer and leave empty - this will unload all cargo on the train just like the unload order, this order however gets the train "virtual" money (the yellow money). This order can be assigned by clicking both the transfer button and the unload button.
You have the following setup in a town which feeds a central station with passengers as in the picture to the right. Note that there are 4 station in this ring and the trains can drive both directions, the orders of the trains driving clock-wise will be explained in this section. SDH is the station where all ICE trains go to and that will be the station that will receive the passengers from the feeder trains.
Sonderhorst Woods is the first station after the unload station and won't need a transfer orders as there is no cargo in the train yet. The next station is Sonderhorst, this station needs a Transfer and take cargo order so we keep the current passengers loaded and take the passengers waiting at the station with us. Sonderhorst Heights needs the same orders as Sonderhorst. Last in line is SDH, this station will need a transfer and leave empty orders so the train will unload all the passengers loaded and also make some virtual money. The order list will end up looking like this:
This kind of orders are very usefull when working with SBahn and must be used when working with SBahn rings with 3 stations or more.


